In this post I will show you how to create a cheap CCTV system that uploads to the cloud.
After moving my office into my garage I found I needed such a system so I built one & thought I’d share my newly found knowledge with you all.
My new CCTV system takes images from 2 cameras, 1 mounted outside the garage and a webcam inside the garage. It then records both images and videos and immediately uploads them to the cloud in case the computer which is collecting the information is itself stolen.
Equipment needed
- External CCTV camera
- This has to be weatherproof ideally with IR lighting built in.
- A Webcam
- I would buy the best webcam you can justify as you want the images of the intruders to be a clear as possible
- A Cloud Account
- Ideally this will be with something like Google Drive or Dropbox, you can use FTP but there may be limitations as the number of connections etc
- A Video Card for your Computer
- You will need some sort of video card that has the right connections from your camera
- CCTV Warning Signs
- Here in the UK the ICO who is in charge of peoples privacy rights has deemed that if you are going to use images or people taken from CCTV then you must inform them that you have CCTV equipment in use.
- An Operating System
- Finally you will need an operating system capable of running this software and for that I recommend a linux system such as Ubuntu
Hooking it all together
Step 1: The Video Capture Card
I would suggest that if you do not already have a card installed you choose one that is compatible with one of the various TV/PVR software libraries such as MythTV. MythTV has a good guide when it comes to choosing a card and is a good starting point if you are a beginner. The video card that use is a Compro S350 that accepts RCA video connections. This is the video connection that my camera has so I was in luck with this stage of the process.
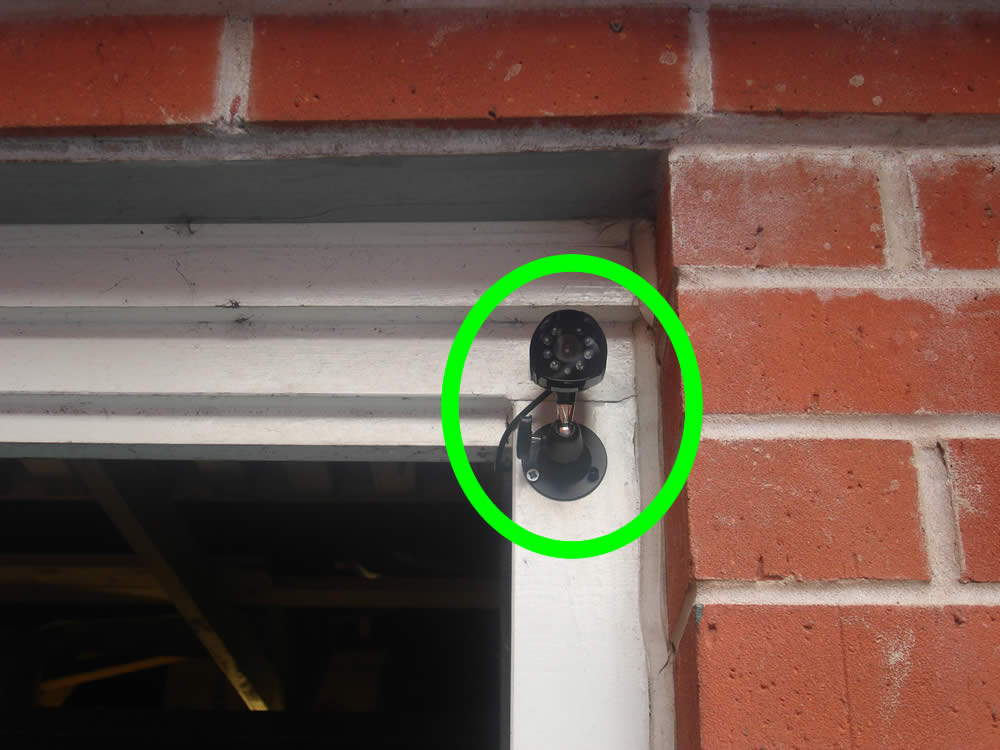
Step 2: The Camera
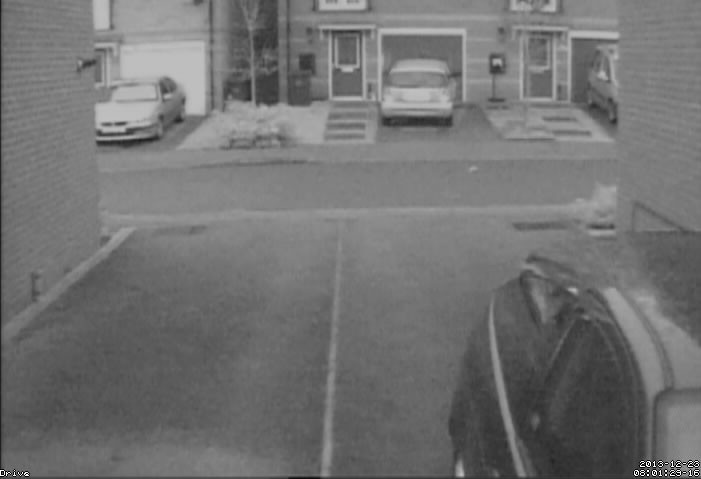
First of all you need to put the camera in the correct place for the area you want to monitor. For me this was just above my garage door. I set it up so that the view-point of the camera can monitor the shared double drive that our neighbours and us share. The view extends over the road and onto the opposite houses (luckily they are town houses and the bottom floor is a front-door and a garage only).
The wires from this camera go inside the garage and are routed to the back of my Computer where they go into the video card (that I already had installed for Freesat).
Step 3: The Webcam
Next is the webcam. The webcam’s job is to grab any images of intruders that actually get past the first line of defence, and then upload as many images of the intruders to the cloud for later use if needed.
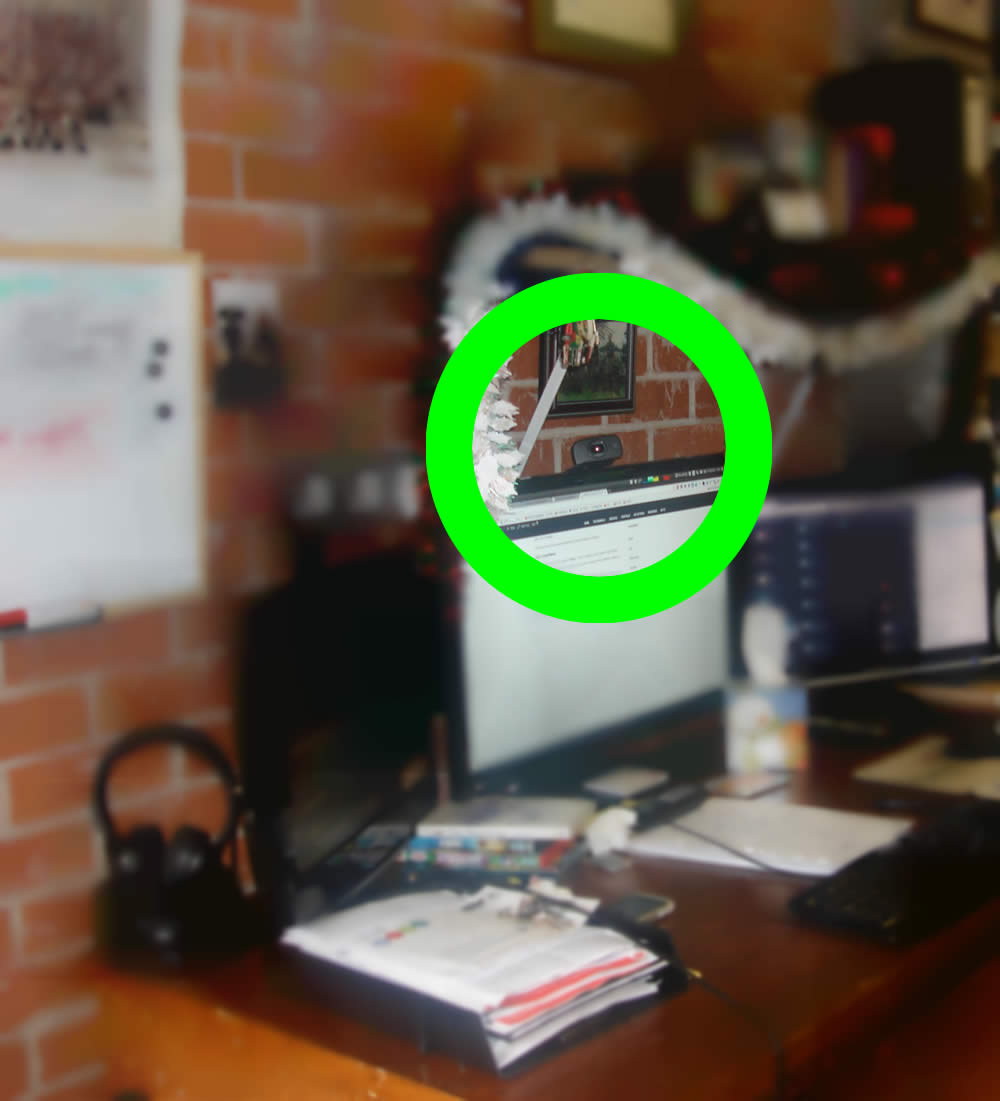
With the webcam set up so that it faces the garage/office door I have maximised the chances of capturing images of any intruders and uploading them to the cloud before the computer is possibly unplugged and stolen.
Step 4: Test the cameras
Before we install the camera monitoring software we need to make sure that the cameras themselves are working and we know which camera relates to which input.
The best way to do this is by either installing VLC or Cheese Webcam. This example shows using VLC to find out which video input is assigned to which camera.

In VLC, right click on the blank area of the window and select “Open capture device”, you will then be presented with the below box. I am typing this post on my laptop so I only have one input but if all is well you should see at least two inputs.
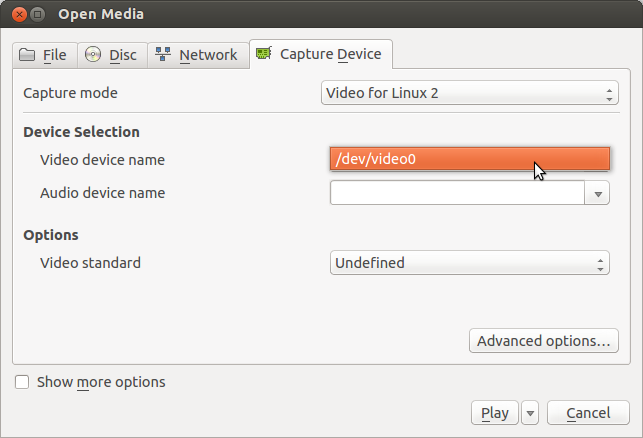
All you have to do is cycle through the video inputs and take a note of which video input is assigned to which camera.
Step 5: Install Motion
The ideal software for this project is Motion. This is a brilliant, not to mention free piece of software that allows you to control not only the cameras but the detection status as well as the quality and the interval etc.
For Ubuntu users like me this is simple. You just install it via Software Centre. For other users you will need to follow the instructions that are given on the Motion website.
Step 6: Configure Motion
Once it’s installed you will need to configure it. It is pretty much configured for one camera already.
By default it is located at /etc/motion/ If you have a camera and a webcam you will need three files
- motion.conf
- thread1.conf
- thread2.conf
All the generic options are placed in motion.conf and all camera specific options go in the particular thread files. The Motion website has good documentation on all of the config options.
Step 7: Upload to the Cloud
In this example I shall be using the Google Doc CLI. We will be using this facility along with the on_picture_save config option. This will allow us to upload images to our Google Docs/Drive accounts as soon as they are taken by motion. This way, if an intruder gets past your other lines of defence and steals your computer you should have plenty of images already in the cloud and safe for future use.
Step 7a: Install the CLI
The Google CLI Downloads page has loads of options and as an Ubuntu user I’m very pleased to see a .deb file for each release.
Step 7b: Configure the CLI
The first time you use the service you will have to authorise the computer you are on to use your Google Account. It makes sense therefore that we do this early. The format of the CLI input is
Google <Service> <command>
. So to authorise your computer just try to list the contents of your Google Drive with
Google docs list
You will then be asked to enter your Google username. Make sure you enter the full email address that you are registered with. Once you enter your username you will be presented with an interface that will give you an authorisation code to enter back into the command line. Enter the code in the command line and Bob’s your Uncle; Fannie’s your Aunt (that good).
We also need to make sure that we upload to the correct folder. The CLI does not take a hierarchical folder structure; it simply takes the name of the directory that you wish to upload to. That means that you need to make sure that you have a directory with a unique name to upload your media content to.
Now enter
sudo gedit /etc/motion/motion.conf
Find the line that says
; on_image_save
Now change it to
on_image_save Google docs upload %f <upload_directory>
for example to upload to the CCTV folder I use
on_image_save Google docs upload %f CCTV
The %f bit is a motion shortcut for the filename. you can change the format of the filename in the motion.conf file
Step 7c: My setup
You may be wondering how I have my motion configured.
I have my video files set at 25 frames per second on both cameras with 100% image quality (I’m looking at reducing this though).
I have the external camera set to take 1 shot per video. This is the option that detects the most pixels changed and uses this as the image/thumbnail. On the webcam I want as many shots as I can get of any intruders so as well as the video file each and every frame is saved to a separate file/image (and uploaded).
That’s it, now it’s time to test it all.
If you’ve configured motion properly you should be able to fire up http://localhost:8081 and get one camera…

…and change to http://localhost:8082 and get the next camera (your camera order may not be the same as mine).
What Next?
There are a few things that we still need to consider:
CMS
Unless you have massive amounts of [hard drive] space to use you will be needing some sort of system to manage how much media you store. There are several options:
- Automatic deletion of media over a certain amount of days eg over 3 days
- A purge on media when storage gets down to a certain threshold eg purge media when storage gets down to 10GB
- Do nothing and simply have a manual approach: assuming you are able to check on your system at regular intervals this is a viable if not time consuming option
I am currently in the process of creating a CMS for my CCTV system which will allow such options and once the system is complete I will probably be releasing it for beta testing.
Automatically Start Motion Detection
I have found that one of the biggest pains of the current system is having to manually start and stop detection. Again there are several options.
- Have cron jobs start and stop your detection system
- Use the Motion plugin that starts and stops detection based on whether a registered bluetooth device is in range or not
- Simply having shortcuts or keystrokes set to start and stop detection
Conclusion
That’s it: I have left out the configuration details for motion as every system is different and you may not want your system set up the way I have but with a cup full of technical know-how & a bag full of enthusiasm it isn’t too difficult to create a cheap CCTV system that uploads to the cloud. You can make it quite configurable and suit it to your own needs. There’s nothing saying that you cannot extend this to a whole array of uses included live webcam streaming etc (which is one of the features I have already implemented in the CMS that I am creating).
Shaun Bellis liked this on Facebook.